General Tab
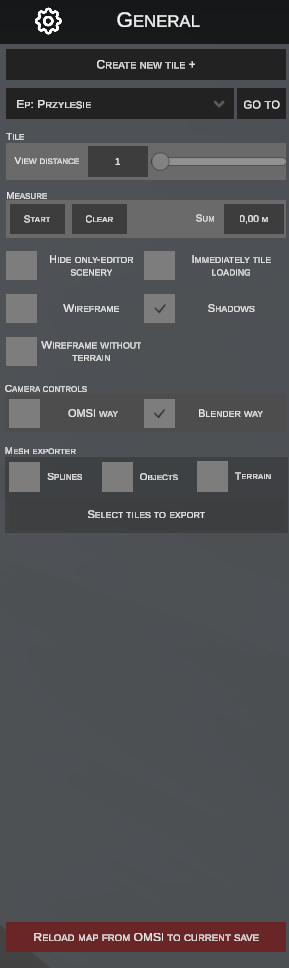
The General tab (represented by the gear icon in the side toolbar) is the central configuration hub for the editor's workspace, terrain tile management, viewport modes, and utility tools.
It allows you to quickly adjust editor parameters, manage rendering options, and execute precise measurements and 3D exports.
1. Creating a New Tile (Create new tile +)
The CREATE NEW TILE + button initiates an interactive mode for expanding your map with new, empty terrain sectors:
- After clicking the button, the editor enters mouse-listening mode.
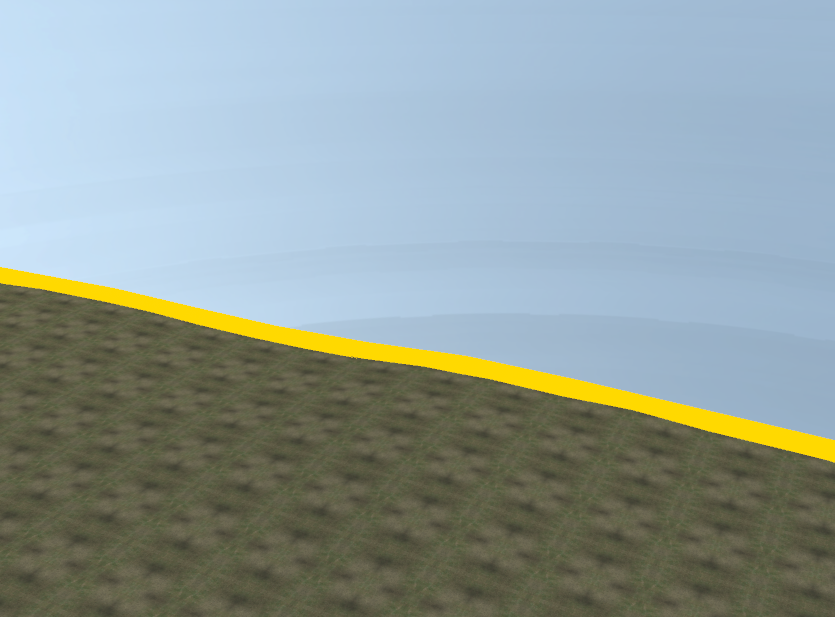
- When you hover near the outer edge of any existing tile (within 60 meters), the target edge is highlighted with a yellow guide line indicating the expansion direction.
- Clicking the Left Mouse Button (LMB) automatically:
- Saves the new tile into the local SQLite database
EditorCache.sqlite. - Immediately loads the tile into the scene and adds it to the quick navigation list.
- Saves the new tile into the local SQLite database
- Clicking the Right Mouse Button (RMB) or pressing Esc cancels tile creation mode without making changes.
Deleting Tiles
If you need to delete tiles, you can do so in the Save Manager.
2. Quick Navigation (Go To)
Located beneath the tile creation button, this module allows instant camera jumps to key areas of the map:
- Dropdown menu automatically groups available targets in the project:
Ep: <Name>– defined Entry Points (bus spawn points at terminals and stops).Tile: <X_Y>– coordinates of specific terrain tiles in the map.
- GO TO button:
- When selecting an
Ep:entry, the editor locates the tile containing that entry point and centers the camera directly above its 3D coordinates (adjusting height to the terrain). - When selecting a
Tile:, the camera centers directly over the midpoint of that sector. - The camera adapts to the active projection – in perspective mode it angles at 45° from an altitude of 50 m; in orthographic 2D mode it views vertically from above (90°) at 100 m altitude.
- When selecting an
3. Tile Loading Range (Tile – View distance)
- VIEW DISTANCE (slider and numeric input):
- Default value:
1. - Specifies the radius of neighboring tiles loaded around the camera's current position (e.g.,
1loads the current tile plus 1 tile in each direction, forming a 3×3 = 9 tile grid). - Keeping the value at
1ensures fluid performance on lower-spec hardware, while higher values (2–3) provide a broader panoramic view of the surrounding landscape.
- Default value:
4. Measurement Tool (Measure)
The built-in measuring tape enables precise distance measurements in the 3D viewport (e.g., roadway widths, platform lengths, clearances):
| Button / Field | Function |
|---|---|
| START | Activates measuring mode. Click the left mouse button across the scene to place consecutive points. A yellow measurement line with segment length tags is drawn between points. |
| CLEAR | Cancels measurement and clears all measurement lines, points, and labels from the view. |
SUM (e.g., 0.00 M) |
Displays the cumulative total length of the entire measured path in meters in real time. |
Completing a Measurement
Pressing Esc stops placing new points while keeping the current line and total sum visible on screen.
5. View and Optimization Options
A set of toggle checkboxes controlling geometry rendering and visual effects:
| Option | Description |
|---|---|
| HIDE ONLY-EDITOR SCENERY | Hides all objects and splines tagged with OnlyEditor (e.g., invisible collision boxes, path helpers, navigation markers). Shows the map exactly as it will appear in the simulator. |
| IMMEDIATELY TILE LOADING | Controls automatic tile streaming. When enabled, the editor prefetches and loads tiles as soon as the camera crosses the midpoint of the current tile. When disabled, loading occurs only when the camera nears the extreme tile edge. |
| WIREFRAME | Switches the entire scene rendering (terrain, splines, objects) into polygon wireframe mode, disables shadows, and sets a neutral background. Ideal for analyzing 3D mesh topology. |
| SHADOWS (enabled by default) | Toggles dynamic shadow rendering in the editor. Disabling shadows significantly reduces GPU load in dense urban areas. |
| WIREFRAME WITHOUT TERRAIN | Wireframe mode variant where objects and splines render in wireframe, but the terrain mesh is completely hidden. |
6. Camera Controls
Select your preferred camera navigation profile:
- BLENDER WAY (recommended, default) – intuitive navigation modeled after Blender (orbit and pan via middle mouse button / scroll wheel).
- OMSI WAY – classic movement style ported directly from the original OMSI 2 editor.
The selected camera style is permanently saved in application settings across sessions.
Detailed Camera Shortcuts
A full reference of all key combinations, 2D isometric view (F2 / F3), and precision mode (F5) is available on the dedicated Camera Controls page.
7. 3D Mesh Exporter
An advanced utility for exporting selected map sectors directly into 3D object format (.o3d / .sco):
Export Components (Checkboxes)
- SPLINES – exports road, track, and sidewalk geometries.
- OBJECTS – exports scenery objects within the selected area.
- TERRAIN – exports the terrain surface mesh.
Export Procedure
- Check at least one component (Splines, Objects, or Terrain).
- Click SELECT TILES TO EXPORT – the editor enters tile selection mode:
- The tile under the mouse cursor is highlighted in yellow.
- Clicking LMB selects the tile (outlined in green). Clicking again deselects it.
- Once at least one tile is selected, the button label changes to EXPORT TO O3D.
- Clicking the button merges selected geometries into an
.o3dfile along with an.scoobject definition, automatically opening the output directory in Windows Explorer upon completion. - Press Esc at any time to cancel selection mode.
Encrypted o3d Files
If the editor detects encrypted o3d files on a tile, they will be skipped during export. nEditor is not intended to modify or decrypt protected geometries.
8. Reload Map from OMSI
Red button at the bottom of the panel:
Used for emergency or deliberate state resetting of the current save:
- Purges all unsaved changes stored in the local editor database for the active save.
- Rereads map and tile definitions directly from the original OMSI 2 disk files (
global.cfgand.mapfiles). - Completely reloads the scene from scratch.
Irreversible Data Overwrite
Clicking this button prompts a confirmation dialog. Using this function permanently discards all changes in nEditor that have not yet been exported to OMSI!