Vegetation Tab
The Vegetation tab (indicated by the tree icon in the side toolbar) is a dedicated environment for creating forests, groves, tree clusters, shrubs, and urban greenery in OMSI 2.
It combines precise individual specimen placement with procedural brush painting across expansive forest tracts, a preset cluster composition system, and real-time interactive 3D scaling of tree height and crown proportions.
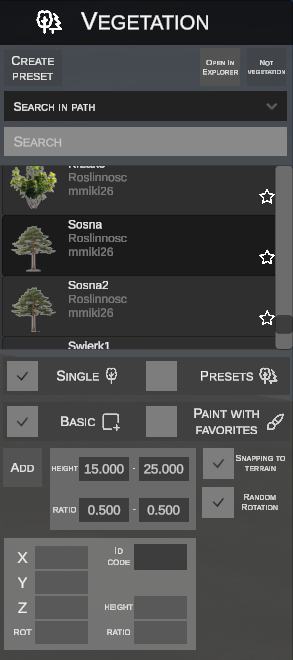
1. Top Bar Library Utilities
Global operations are accessible in the panel header:
- CREATE PRESET – creates a new multi-plant arrangement preset.
- OPEN IN EXPLORER – opens the folder containing the selected model file in Windows Explorer.
- NOT VEGETATION – reclassifies the object back into standard scenery objects (only applicable to models previously categorized as vegetation from the objects tab).
2. Search and Plant Library
- Search Scope: Dropdown allows targeting where queries are searched:
Path– searches file path strings only,Name– searches object names,Everywhere– searches all metadata (paths, names,.scogroups).
- Plant List: Scrollable list with preview thumbnails, origin paths, and a star icon to add to favorites.
3. Core Working Modes: SINGLE vs PRESETS
Workflows are divided into two fundamental modules toggled at the top of the panel:

| Module | Description |
|---|---|
| SINGLE | Working with individual tree and shrub species from the library. Supports single manual placement and brush painting using favorite species. |
| PRESETS | Working with complex multi-species compositions (e.g., mixed woodland, birch groves, roadside thickets). Enables placing pre-built clusters or brush painting with entire foliage groups. |
4. Single Species Mode (SINGLE)
Two placement workflows are available in the SINGLE module:

A. Basic Placement (BASIC)
Enables precise single specimen planting with automated dimensional randomization:

Placement Parameters:
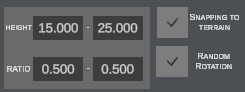
- HEIGHT (min - max, e.g.,
15.000 - 25.000m): Random height range. Each placed tree draws a random altitude within this interval. - RATIO (min - max, e.g.,
0.500 - 0.500): Crown aspect ratio (width-to-height proportion). - SNAPPING TO TERRAIN: Automatically snaps tree roots to the terrain surface.
- RANDOM ROTATION: Random vertical yaw angle applied per placement (avoids repetitive crown alignments).
- Action Buttons:
- ADD (key: N) – activates placement mode; the plant tracks the mouse until you click LMB or press Enter.
Selected Plant Properties:
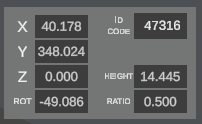
Clicking a plant displays its property sheet:
- Coordinates X, Y, Z on the tile,
- Rotation angle ROT,
- Individual height HEIGHT (editable numerically in meters),
- Crown proportion RATIO,
- Unique internal ID CODE in the OMSI map structure.
B. Painting with Favorites (PAINT WITH FAVORITES)
Instead of manual clicks, surface brush painting rapidly populates large areas using favorite species from the bottom shelf:
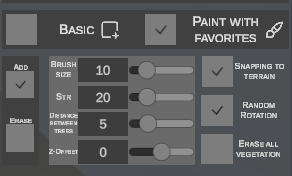
Favourites Bar:

- Starred plants appear in the bottom tray.
- The brush samples randomly across all active favorite species.
Brush Parameters:
- ADD / ERASE: Toggles between planting and erasing foliage.
- BRUSH SIZE (e.g.,
10m): Radius diameter of the circular brush. - STR (Intensity, e.g.,
20): Planting rate and density during mouse dragging. - DISTANCE BETWEEN TREES (e.g.,
5m): Minimum separation distance between trunks, preventing unnatural overlapping. - Z-OFFSET (e.g.,
0m): Vertical root offset (useful for setting shrubs into slopes). - SNAPPING TO TERRAIN: Snaps every placed specimen to the terrain surface.
- RANDOM ROTATION: Randomizes rotation per instance.
- ERASE ALL VEGETATION: When enabled, eraser mode purges all foliage. When disabled, erases only species belonging to the active group.
5. Keyboard Shortcuts and 3D Manipulation
Shortcuts available in vegetation mode:
| Shortcut | Function | Description |
|---|---|---|
| N | Add New Plant | Spawns a new instance of the selected plant under the cursor. |
| G | Grab (Move Horizontal) | Translates selected plants across horizontal X/Y planes. Confirm with LMB; cancel with Esc. |
| Z | Height Z | Modifies root elevation via vertical mouse movement. |
| R | Rotate (Yaw) | Rotates the plant around the vertical axis. |
| S | Interactive 3D Scale Mode | Scales plant dimensions in real time with mouse movement! The plant highlights in cyan: |
| ↳ Z (in scale mode) | Scale Height | Default scale mode: dragging mouse adjusts plant Height, recalculating the model live. |
| ↳ X (in scale mode) | Scale Ratio | Toggles scale mode to crown Ratio – dragging adjusts crown width. |
| Ctrl (hold) | Step Snapping | Snaps translation to 1.0 m intervals and rotation to 15° increments. |
| Del | Delete | Deletes selected plants from the map tile. |
| Ctrl + C | Copy | Copies selected plants to the clipboard. |
| Ctrl + V | Paste | Pastes copied plants under the mouse cursor. |
| Esc | Cancel | Aborts active transformation or clears selection. |
Box Selection
Dragging LMB across empty terrain initiates a rectangular box selection (box select) to highlight and manipulate dozens of plants simultaneously.
6. Forest Preset Compositions (PRESETS)
The PRESETS module enables creating multi-species forest templates with balanced heights and spacings:
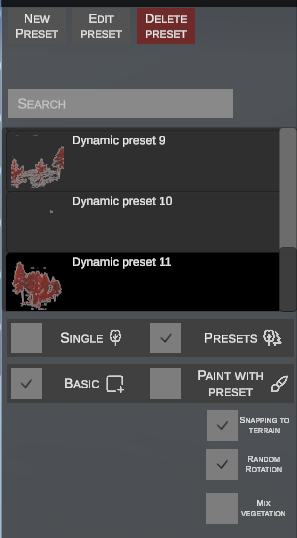
Preset toolbar options:
- NEW PRESET: Launches the 3D composition editor to design a new preset.
- EDIT PRESET: Opens the selected preset for adjustments.
- DELETE PRESET: Removes the selected preset from the library.
A. Creating a Preset from Selected Map Trees
Turn an attractive arrangement on your map into a reusable template with one click:
- Select a group of trees in the 3D scene:
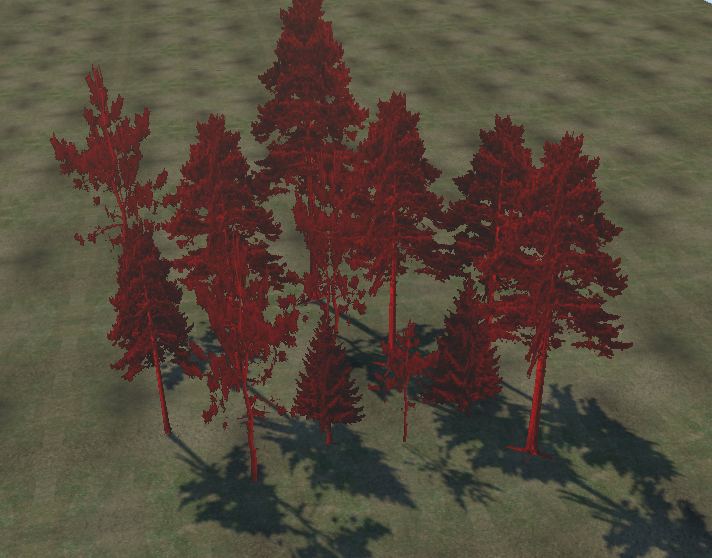
- In the top bar, click CREATE PRESET:

- The editor captures relative positions, heights, ratios, and rotations, saving the cluster as a new library preset!
B. Preset Editor Mode
Clicking NEW PRESET opens a dedicated editing environment:
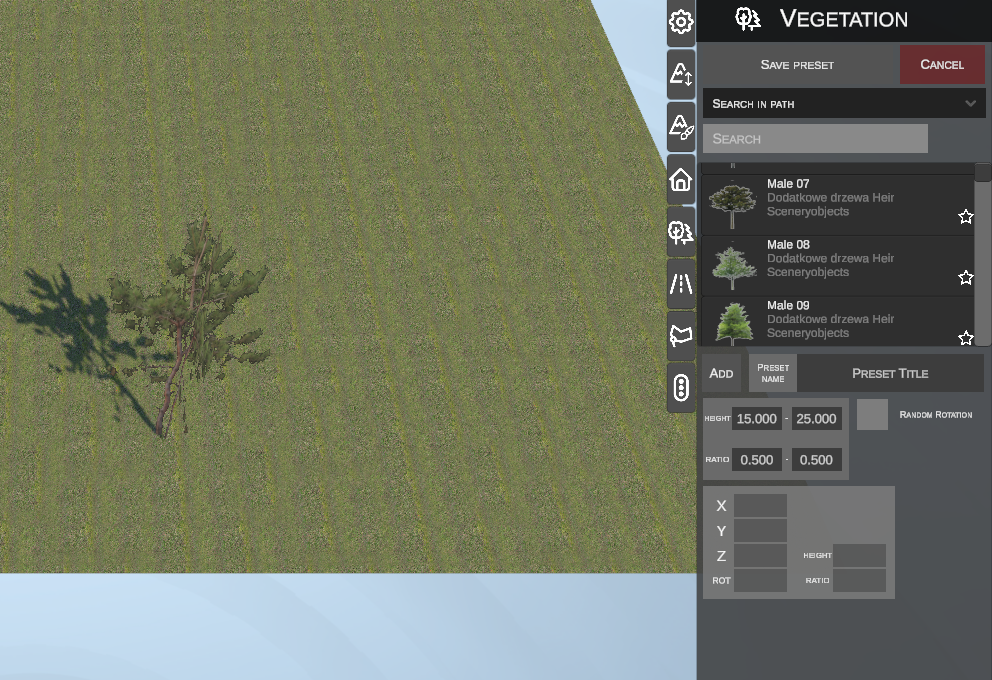
- Freely place various species, adjust scales (S), heights, and spacing.
- In the side panel:
- Enter a name in the PRESET TITLE field,
- Configure RANDOM ROTATION,
- Click SAVE PRESET – the application renders a 3D preview thumbnail and adds the preset to your library!
- CANCEL aborts and returns to the map.
C. Deploying Presets on the Map
Presets can be applied in two ways:
- Basic Placement (BASIC):
- Select a preset and click ADD (key: N).
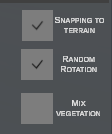
- The entire cluster places simultaneously, maintaining relative layout and snapping roots to terrain (Snapping to terrain).
-
MIX VEGETATION dynamically randomizes species variants within the cluster.
-
Painting with Presets (PAINT WITH PRESET):
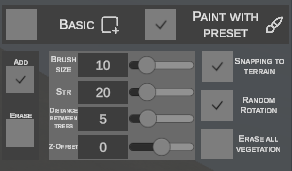
- Rapidly populates vast map tracts using the active preset composition.
- Stamps multi-tree clusters while randomizing rotations and respecting minimum group separation (Distance between trees).